| |
Flexi Skirt Maker - MANUAL - Fashion
Click Here
for Main Page on our OnP Deluxe Flexi Skirt Maker
Notecard 3: Fashion. Fitting, and Styles
Items included:
1. Attachment means to blend
2. Fashion – skirt types and some ideas how to make them
3. Coloring
4. Texture usages (note: See also notecard #6 - the new texture
spreading software
5. Tips when done
ATTACHMENT
Of course attaching a skirt to an avatar like much else in SL is an
illusion. It is hard to get it to attach right at the waist. So, then
much of the time, a flexi skirt attaches around the hips using SL pants
or skirt below of the same color to blend it in and make it seem part of
the same skirt. In this package, there should be a box of slip textures.
One of our favorite ideas is to use an sl skirt below a flexi skirt, but
make it double function as a slip. To do that, our slip textures have
lace on the bottom as a slip would. The slip textures you can make into
SL skirts with your brand name on them. Note that they come in
difference sizes and also have a “t” rating for transparency – a system
we have been using for years. The value after the “t” is the amount of
transparency: t00 means 0% transparency or none, and it means opaque and
that you cannot see through it, t15 for example would mean 15%
transparent, and t35 means 35% transparent. So you can use the slips and
color them to match the flexi skirt you are making. They come in 6
different lengths.
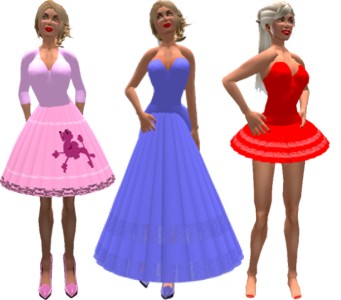
------------------------ Part Two: FASHION and SKIRT TYPES ------------
TYPES OF SKIRTS:
And yes, all of these can be done with this kit. Just different lengths,
different attachment points some times, sometimes different center
openings, or different transparencies. This may seem odd, but quite
often you do not have to start over and make a new skirt to do each of
these for each type – you might be able to just make copies of a
finished made skirt and modify it while temporarily leaving our software
in it while you continue adjustments. Sometimes you just need to change
the size and attach it differently.
You can use the normal SL approach in many cases to change the size.
Just right click and edit the flexi skirt. Then hold down both the
control key and also the shift key at the same time. You will see gray
boxes. Pull a box out to make the skirt larger, pull it in to make it
smaller. Note that your wearing point will also likely change and you
again will need to use a posing stand for your avatar while you use the
normal editing arrows to adjust it on your avatar. Skirt types:
 |
|
MEDIUM LENGTH – Normal – 0.7 to 0.9 meters long or to suit your tastes.
We prefer the cone type, but prisms we now find interesting as well
since they give a pleated look. At one time, most everyone used boxes,
but many switched to cones as looking more lifelike and full.
GOWN LENGTH – perhaps start out with 1.2 or 1.5 length samples, or just
resize what you have
MINI SKIRT – perhaps 0.5 m long or even shorter like 0.3 for a micro
skirt |
| |
|
|
 |
|
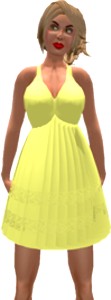
HIGH SKIRT – chest attach – these are fun. Attach to your chest and
adjust the flexi skirt just below the
bosom area to fall as a nightgown or high attaching skirt. You might
need to open the center a little or even a bit oval for best fit.. For
the most recent one we made, we used an angle of 40 degrees to start,
but still used 24 for the number of pieces and began with I believe a
length of 0.6m. We then when done adjusted the center opening and the
flexi for best fit.
Note - for this high attach - after making the skirt if you add
transparency, you can make this into a negligee as well. |
| |
|
|
 |
|
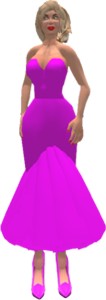
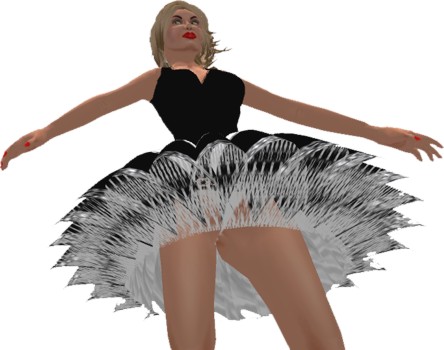
ROUCHE – the word Rouche means attachment. This odd skirt combination is
one of our favorites. In this case use an SL skirt the same color fairly
long but above your ankles to suit. Now make a small flexi skirt to
attach to your pelvis but have it attach way low sort of near your knee
caps or thighs. Now if you wish, add a second (just copy the skirt you
already have) to your right upper leg and angle it to suit, but make it
match the bottom length of the first skirt. Then add a third attaching
to your left upper leg that tilts inward similar to the one on your
right. Now you have a shapely dress that is not overbearing and far out,
yet quite feminine. Adjust sizes to suit. What sizes work for us? The
best we liked so far was just 12 for the number of strips, of course
with one center. We made it 0.8 meters long and about 0.4 wide and 0,2
deep (the normal depth setting). We set the flex to mostly all “1”s
except for wind and x,y and z which we set to 0. Then we of course did
use all three skirts after copying the first that we made and removing
the software. I think we did angle in the sides a bit, but also made
sure that they all went the same length down. The rouche skirt is one of
our favorites. It is very feminine yet the skirt does not shoot out so
far as to cover your dance partner – or at least cover your dance
partner less. Elegant I feel. |
| |
|
|
 |
|
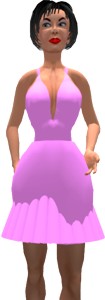
TIGHT SKIRT - the "Asian Cutie" - I call it an Asian Cutie skirt since
my best memory of seeing this style was on late movies where a very
pretty Oriental girl is wearing a tight skirt and that tight skirt just
has some small flexi at the bottom to assure us that it is a skirt and
is not just painted on. So, in this case we need to create something of
an illusion such that the bottom of the skirt appears to be a composite
of flexi with an SL type skirt that you make in appearance. Now, you may
wish to play with this one if you like the idea, but here are some
general directions that might get you close. Use Material of cone 0.3.
We want it short since it is just going to be near the bottom of the
other skirt. We have tried both 24 for the number and also 16. If you
use 16, you will likely need to increase the width of the skirt material
to 0.3 or so after the skirt is made. 24 is okay as is. For angle, I
would say an angle of 40 degrees or less. Then make the flexi skirt. Now
the base for this is going to be a normal sl skirt that you make in
appearance. So make that now. I would not use our slip pattern or any
other complex pattern. However, you could use one of our overall large
patterns or one of your own. We just suggest the normal SL skirt to be
very normal. Now the SL skirt should be short and come down to
mid-thigh, which means in the middle roughly of the upper leg - halfway
between the pelvis and the knee caps. Then ensure it is tight fitting
using SL controls for no bustle and no looseness.
Okay, now we go back to the flexi skirt made. Use SL techniques of right
clicking and editing it and then hold down ctrl and shift to see gray
boxes. Pull them in such that the skirt is even a little bit smaller -
about 20% smaller - or perhaps about 0.25 meters high. Then get the
skirt menu and go to the main menu and press "reset". This causes both
software programs to re-look at the skirt and see its new dimensions.
Now we need an oval opening in it. A starting point for you might be to
use xy open to set both at once to about 0.05 m. Then adjust y open to
0.1m wide or so, either by selecting that number or by using +0.01 five
times to get it there. Now you might want to save the skirt, and then
pelvis attach it, but now wear it such that its bottom is the same
bottom of the SL skirt that you made. That might seem odd that both are
in the same place, but the idea is that as the wearer moves, you will
always see skirt in the same area - sometimes the flexi skirt and
sometimes the SL skirt. Now modify texture and color of this and your SL
skirt to suit and then add a matching top. Also adjust flexi settings to
suit. And of course when done, please remember to remove the software
and items inside. We do like this skirt affect. But we do admit that we
also played with it a bit. |
| |
|
|
 |
|
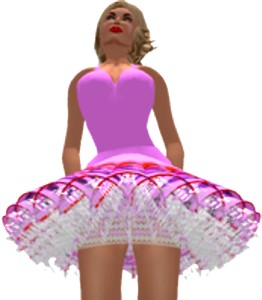
PETTICOAT – You may also wish to look below and see how to combine this
as well. But a petticoat often looks both lacy and full. You can start
with the normal cone shape of maybe 0.7 meter length or to suit, and
even use the standard angle of 60 degrees and also the number 24 of
pieces. Then after the skirt is made, set the flexi. Then we suggest
changing the cone shape to “Solid” to give it more body below. Then we
suggest increasing the depth maybe to twice as much. You might also
consider changing the cut angle to see if you like it that it makes it
even more full. These items should make the petticoat seem more full
when looking up from the bottom. Then add a lace texture and color to
suit.
Want a color skirt over it? Make the color skirt and then rez each to
the ground and ensure the x and y locations are precisely identical.
Then raise the color one to be just over the lace petticoat. When you
have them just where you want them (be sure the top one is just a little
above so when the skirts move that the top one mostly is still on top.
We like to use the SL method of ctrl-shift during edit to make the top
one a wee bit larger, but then of course moving the top one and then
ensuring again that x and y locations for both skirts are still
identical. But when all looks positioned well, then attach the two
skirts (after you have copied both for safety) by left clicking the
bottom lace one first, then hold down the shift key while clicking the
top one, and then use "ctrl" and "l" (small L) to join them. Then save
to your inventory. Then when you wear them, or "attach to pelvis" then
you will have the combination of the top skirt with the lace petticoat
underneath. |
| |
|
|
 |
|
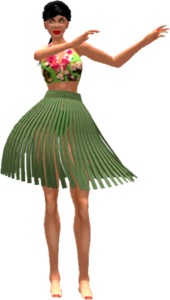
GRASS SKIRT – start likely with a sample or even begin with a box type
starter piece of 0.7 or 0.8 length or to suit. Then consider using a
number like 60 or so strands. Yes, this will take a bit to make the
skirt and you will need an area that allows 61 prims free in order to
make the skirt. Of course, when it is worn, it does not add to your
sim’s prim count. And yes, this will take a few minutes to make most
likely. When done, if you used our sample, then change the width to make
the strands narrower perhaps 0.02 or 0.03 wide.. When that is done, use
a grass texture that may even be found in the SL texture library that
came with your avatar. You of course can add more green if you wish or
add a small amount of transparency. Now as for the center, leave it the
way it is or add center or oval to suit your tastes. If you are handy,
you might want to consider making a prim belt for the top – perhaps with
flowers on the side? Of course, if you just want a one piece belt,
change the transparency and sizing of the cylinder that is there already
to make it a larger wider cylinder such that now it looks like a belt.
Adjust it and taper it to your tastes. How do you adjust just one item
of a skirt? Edit the skirt and then right click the box "edit linked".
Then click away at the floor or away from the item to get it to stop
highlighting everything, and then just click the center piece (use show
or ctrl-alt-T to see it) and then adjust its transparency to 0 and its
color and its size to suit.
And of course is you want a more complex belt perhaps with flower
texture or prim flowers that you make, , you can then consider combining
the belt that you made with the skirt top using ctrl-l (small L – for
link) as indicated below in combinations. |
| |
|
|
 |
|
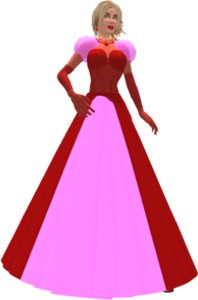
PRINCESS SKIRT –
Some princess type skirts have a different color right in front of the
gown. To do this edit the skirt while you are wearing it and you are
also on a pose stand. Then click the box for “edit linked parts”. Now
just left click the ground or something to just stop highlighting all of
the parts. How go back and just click the item you wish to change. If it
is the center skirt portions, then just set each of the front ones to a
different color or texture just in the front as you wish. |
| |
|
|
COMBINATIONAL SKIRTS
How? Note that if you copy and rez two skirts instead of wearing them,
that you can set x and y and z locations of both to make them just above
each other. If you wish, you can make the top one a bit larger or
smaller using ctrl and shift and moving boxes in or out. Consider also
if you wish to rotate one skirt slightly such that the edges are a bit
mismatched or precisely offset instead of directly on top of each other
and thus may seem more natural. Also consider how much higher one should
be then the other. Then to combine them, edit the lower and while
holding down the shift key, left click the top one. Then after both are
selected, using ctrl and l (small L) should join them. Note that
conversely ctrl shift and l will cause them to unlink. But careful, when
they unlink, all will be separate pieces and each skirt would be no
longer linked. Note that when linking, the last piece connected to
before you do the linking will be the “root prim” –and it will determine
the location for the whole skirt.
Using this method, you can combine skirts into just one attachment point
to add body or fullness, or a special effect. Careful on color and
texture though. Once you combine the skirts, both the top and bottom now
would change color and texture. If you wish them different colors,
texture or color them BEFORE you combine them.
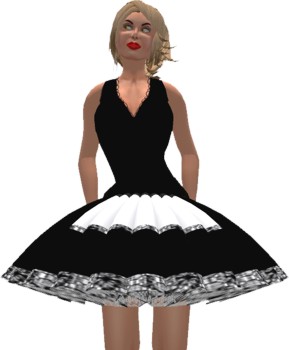
GIRLY PETTICOAT SKIRTS – you can do a combined skirt over a petticoat by
making the petticoat discussed above and perhaps keeping it white lace
or change color to suit. Then add a colorful skirt above it with the
same or improved flexi to keep it up there or to suit your tastes. Now
you have a very feminine style top skirt with a petticoat – that
attaches to only one needed attach point.
MORE FULL SKIRTS – As we mention above, if you wish a more full skirt
and have a 24 item skirt (24 flexi parts plus the cylinder in its
center) – you could combine them together to make a more full skirt.
DIFFERENT ATTACH POINTS – another way of combining skirts is with
different attach points. Sometimes skirts are made with combined skirts
added different places. For example, one could begin with a long SL
skirt (non flexi) that is somewhat close to the body of the avatar. Then
you could add rouche attachments to the bottom (see the rouche
description above). And in some cases some also add a mostly transparent
skirt with gold stars or the like over mostly transparency and attach
high to the chest. But the idea here is that multiple attachment points
can also make for a complex fun skirt.
SOME FASHION OPTIONS
STRAPLESS TOP
Want a strapless top using our textures for top (shirt) as well? First
ensure you do not use the slip with the straps option beneath the shirt
since that will ruin the whole idea. . Then just choose one of our top
textures (shirt) for making your top. And then when editing the top,
adjust the sleeve length way down to where the top is not only strapless
but just covers the bra area and the midriff area beneath that.
------------------------ Part Three: COLORING ------------
Please of course remember that you can copy and color any of the items
included. The only reason that they are done in white is since white is
the only color that permits any other color to go over it. Of course
black if inherent in the material would allow no coloring. So, how to
change color? For the skirt you would right click and edit it and click
on color on tab four, which is called “texture”. When you choose a
color, note that SL sometimes allows you to drag that color to your
color panel of colors. I generally put it way to the right either in the
top or bottom row. Now you have this color saved to match other items.
For some of the other items we have, when making slips top or bottom of
tops, first of all ensure that you also adjust those in the texture
settings to show all of the image that you want and none of the part of
that texture that you do not want. For example, if you use a long slip
texture such as calf length but never allow the texture image to be that
long, you might not see the lace bottom. After that note, that changing
the SL clothes in texture that I just mentioned is done under
“appearance” and not by clicking and editing. If you did save the color
on the far right of your color chart, now you can ensure you use that
same exact texture on slips and tops if you wish to match perfectly. If
you cannot figure out how to drag a color you are using to the far right
of your color chart to save it, you could also just copy down the rgb
numbers it shows you and also to ensure those are the same.
An SL Beta oddity: We found at least with early SL Beta versions that if
you change colors, SL might not remember it unless you “save” the
finished item with changes when done. You do not have to change the name
when doing this, but sometimes making it an 02 or something might be
even more definite. Why? It seems sometimes SL is confused whether or
not you want copies of the same thing to always be the same colors and
textures and might avoid storing changes. When you say “save” –
especially with a new name, it knows it is a totally different item and
no longer gets confused. Or you could save it with the color name in the
title. I do that often as well. That also allows a different name.
------------------------ Part Four: TEXTURES ------------
Note: This fashion section was done before we
added the new texture spreader. We will begin with one example of what
the skirt maker and texture spreader can do with the first entry here -
the Maid Petticoat skirt. Note that on the Main menu, you can get to
the "Adjust" menu. From the "Adjust" menu you can later choose the
"Texture" menu for texture spreading.
THE MAID PETTICOAT SKIRT using texture spreader
 |
|
First make a skirt using material
cone = length 0.4 and skirt numbers = 24 (24 is the normal
setting). Then save the skirt to inventory and then wear it.
Now go to the "Adjust" menu and select XY Open for the center at
0.08 and then use Y open set to 0.1. These two last items will
adjust the center opening and make it oval. Now go back to the
"Adjust" menu and click "solid" to make the bottom portion solid
with more body. In the Adjust menu, choose "Depth" and set it
to 0.5. This will flair the skirt out somewhat as a petticoat
and again add more body to the bottom appearance. Now we are
ready for texture spreading. From the "Adjust" choose "Texture"
to get to texture spreading. Click "Hphotos" and set it to 24 -
the same number as the skirt pieces. This is the number of
photos we take across the texture. Since it is the same number
as the number of skirt pieces, it will wrap a single texture
around the skirt, putting the center in front when we are done.
Click "return" to get back to the texture menu. Let us now add
the texture. Right click and edit the skirt, go to the texture
tab, and click the texture box to modify it. On the pick
texture screen, note on the top right is an oval white area that
may say "Filter Textures". enter the word "maid" in there,
without the ''" of course. This should help find the maid
texture quickly that comes with the skirt maker. Select it, and
then get rid of the edit.
Continue Below. |
| |
|
|
 |
|
We will continue with the skirt maker
menu. If the skirt maker menu disappears at any time, just
click the skirt to get it back. Now on the skirt menu, we
should be setup for 24 photos. Click the "Do Normal" button.
This will spread the maid texture around all 24 pieces. Okay,
now the main texture must always be done first, and it is done,
so we will do the insides. On the "Texture" menu select
"face". On the face menu select "Bottom". On that same face
menu click "txtuse" (the texture to use) and select "lace2".
Now use return and then on the Texture menu press "Do Normal"
again. Now you should have a lace bottom. Now go back to face
and do a similar thing, but press choose "Inside" and for "Textuse"
use "txtd" Then return and "Do Normal". This last item should
put a satin lining on the inside of the skirt. Now detach the
skirt. Then rez it to ground and remove all of the contents of
tab 5, all software and more, and then save it and you should
have permissions on your maid petticoat. This should give you
an idea of what the texture spreader can do for the other items
here as well.
|
Note: As you can see by the example above, we have now added texture spreading. See Notecard 6. You can get
to the texture spreading menu by selecting the "Adjust" menu on the main
menu, and then on the adjust menu near the bottom selecting "texture".
Note also that now in the main menu that selecting Help gives two
notecards - the second being for the texture spreader help.
TEXTURE ADJUSTMENTS
First of all, remember that even when you add textures to the whole
skirt, that you can also adjust them. As you edit the skirt on tab four
of the edit for the item, you can rotate the texture, or change the size
of the texturing by the size commands, or even the increment where the
texture begins and ends. So all of that can give widely different views
even using the same texturing. If in doubt, the standard is to make the
x and y repeat amounts 1.0 at least as a starting point. However, if the
skirt is narrower, you might want to take that into account and lower it
in the width direction.
MAKING TEXTURES – the FIVE SKIRT in one TRICK
If you notice, skirt pieces tend to be long and narrow. And it does cost
money to upload skirt textures as with any other upload. If you are good
at offline drawing packages, here is a good trick that we use. We upload
5 skirt textures at once for one price. How? Well, since skirt textures
are long and narrow we put 5 skirt textures on one image. In our case we
make the basic starting image 1000 pixels by 1000 pixels. SL will reduce
it later if it thinks this is too much. Then we put 5 skirt images on
that 1000 by 1000, each of them 1000 pixels high by 200 pixels wide. Now
we have 5 different appearances for one upload price. Yay! To use the 5
up skirt texture, apply it to the flexi skirt you made. Now choose about
1.0 (0.99 works better if using transparencies) in the upper direction,
and about 0.4 or a little less in the width direction if using a cone.
You might need slightly different values for boxes or prisms. Now, to
see the different images, make sure rotation is in the right direction.
Some of the 5up textures are pre-rotated such that 0 degrees rotation
will work, but do not be afraid to try other texture rotations – mostly
like 180 degrees. By this I mean rotation of the texture image. Then as
you change the horizontal starting adjust near the bottom of tab 4
texture editing, you will see the different shades. I like to use 5 up
since then the images fall right on even boundaries. I do believe that
the skirt will always begin with the center image since it sets the
center I think at 500 pixels (50% point). So then the other images are
at +200. +400, -200. -400. Of course, you could also use the -200 one at
+800 for you math people. And there you have it. 5 textures for the
price of one. Here is a big tip also. If you want a few items of the
skirt to be different than the others, such as in front for a princess
gown, put both textures there as ones of the five. We may include some
5-ups as part of the package in a box marked flexi skirt textures or
something similar, for you to rez open and store, and perhaps use.
Why so many done in white or off white? This allows you to change the
color and add color to whatever you wish. White is the starting point
often for those who wish to do their own colors.
Note that for some textures that the design is only at the skirt bottom
but that a solid color would likely be where the skirt meats your sl
skirt or sl pants to blend in. We do that since that will make blending
easier, we believe.
TEXTURES INCLUDED IN THE BOX – mostly that we made ourselves offline
We will include a box of some of our favorite textures. You may see some
items with a “t” marking. For years we have used this naming technique.
It means the amount of transparency. t00 means 0% transparent meaning
that you cannot see through it, while t35 means 35% transparent and t70
means 70% transparent. At 70% of course you can mostly see through
something. Some of the items:
BLDG Transparent Wall Tga – Our silly name we have always had for this
texture that is totally transparent. Careful when using it since it
makes items or faces disappear. You can generally find the object by
pressing ctrl-alt-t I think it is to show transparent image in red to
you.
Pattern Lace t50 white – This and the t99 version are two lace patterns
that are real lace – meaning material missing between the real material,
or at least transparent. The lace patterns themselves are 100% opaque
meaning no transparency in them at all. The t50 and t99 refer to the
backing. The t99 is really all transparent for the backing material,
100% transparent between the decorative lace. The t50 is more modest,
having at least 50% transparency backing in the open areas. These items
can be good for petticoats and for decorative areas.
Skirt 5- something – these are some of the 5 up texture skirts that we
talked about above in making textures – the 5 up trick.
Other textures - we gave you full textures in case you wish to use the
textures also for a skirt or pants below. These items just being with
the word 'Textures".
TRANSPARENCIES
We admit that we like to use some transparencies at times since many
clothes items in real life have some degree of transparency. And of
course you do know what I am saying. So sometimes we all add some
transparency for realistic effect or to make the clothes seem more
glamorous. The transparency setting can be mixed into the texture used
or can be added on editing tab 4 of the skirt and set there. You can
also add the two. You could have a texture that is 10% transparent by
the way it is made, and then add maybe another 20% transparency using
tab four. So how do ladies use this transparency and still keep their
modesty? The answer is “the same as in real life” - “layers”. Many women
in real life will wear a slip under their skirt to help hide their
undies. While each layer of clothing may be somewhat transparent, having
a semi transparent flexi skirt over a semi transparent slip over semi
transparent undies can in fact block everything out beneath the undies.
Anyway, the amount of transparency you set is up to your judgment and
your customers.
------------------------ Part Five: When Done ? ------------
When done, do remember after all adjustments are done, to remove the
software, samples and all that is in the skirt contents. That will allow
you to transfer or sell the skirt.
SKIRT ADJUSTMENTS
This depends on your tastes, but if you do not like how the skirt lies,
sometimes changing the center opening or using a posetand and wearing
the skirt, sometime angling the skirt a bit forward or back on your
avatar (higher in the front or back) can give a different look.
MODIFY ONE SKIRT PIECE AT A TIME
Perhaps you want the front a different length, texture or color? You can
modify each skirt piece one at a time also. Edit the whole skirt. Now
click the box that says “Edit Linked Parts”. Now click the ground to
ensure you are no longer selecting the whole skirt. Now just select the
single skirt piece you wish to change. When done changing the individual
pieces though, remember to shut off the “edit linked parts” before
trying to move the whole skirt since you might just move the last
selected piece. If you do move a wrong individual piece, sometimes the
SL “undo” command or ctrl-z can fix that.
HIDE
If you changed textures or transparency, at least for a time the
cylinder in the center may start to show again. Before removing the
software you can select “hide” to hide it again.
thanks! Hope you enjoy our products
Visit us at the Owl and Pussycat Mall
in Second Life at Tissela
look under classifieds for Owl and Pussycat ..or
http://slurl.com/secondlife/Tissela/64/92/102 |
|
