|
Hints for using Corel
Photo Paint
new:
Problems using Corel Photo Paint 8 and Windows XP Operating Systems
Forward
This section is a free section that covers some of the
enhanced features of Corel Photo Paint 8 - and likely will also include
guidance therefore on several other editions of Corel Photo Paint and
Corel Draw. Some of the usages of Corel Photo Paint were shown in
our digital photo section tips which you can go to by
clicking here.
The power of a program such as Corel Photo Paint 8 is
quite extensive, and it is likely that many owners of it are only using
a small fraction of its capabilities. This section will try to
explain using some of the moderate to advanced features.
Mask Tools
  
Mask tools are used to cut out a portion of a larger
picture. That portion that is cut out can be copied and pasted
either as a separate object within the same picture - in order to duplicate
objects, or copied and pasted as a separate document. Mask tools
are found in the "toolbox" toolbar.
Note that mask tools can also be used to create ".cpt"
images - that have irregular backgrounds and are in the shape of the
image itself rather than rectangular. These images therefore have transparent portions.
Normal, Plus and Minus
Note that when using a mask tool, that one needs to
select "normal" (shows as an arrow on the "property" toolbar), "+", "-"
or "Xor". I generally only use the normal setting or "-" setting.
To cut out the item directly that is of interest, one would use the
"normal" setting, and click that option with their mouse. A more
complex usage is the "-" setting, which is used instead to eliminate
portions of the picture.
Property bar mask portion, showing it set to "normal":

Mask Reset
Note that if at any time you make a mistake on a mask,
you can redo it. You can undo it either with the "undo" command
under "edit" or by clicking the mask remove
 symbol on the top
toolbar. Clicking this lets you start over with a fresh new mask. symbol on the top
toolbar. Clicking this lets you start over with a fresh new mask.
Rectangular Mask
The rectangular mask is the easiest to use. If
this option is not showing already under the mask picture in the
toolbox, then click your mouse on the lower right hand arrow of the mask
control and select the rectangular mask - which will show up as a rectangle
with dotted lines. Before using this tool, decide if you wish
"normal" setting. That is the most likely one to use - if you
intend to directly capture the area of interest. Ensure that "normal" is showing as
a selected arrow on the property bar. Then, line up the crosshairs
of the rectangle tool on your drawing with a corner of the image that
you wish. Then press down the left mouse button and drag the
rectangle control to the opposite corner - and it will encircle the area
that you wish. Then this area can be copied using "Ctrl" and "C"
or "Ctrl" and "Insert" depending on your settings. Once your
target picture area has been copied to the clipboard, you can go to
"edit" in the pull down menu and paste it as an object inside another
picture, or paste it as a brand new object. An example of a
rectangular mask is given at the end of the first
page of the digital photo section. In this example, it is used to
highlight a good portion of a photo to make that good portion the
end photo desired.
Note that the rectangular mask can also be used in "-"
mode. If your desired picture has a bad area on top or sides or on
the bottom, you can set the "property" toolbar to "-" for the mask and
subtract the portion of the picture that you don't want. Some
times this rectangular subtract mode is also good for eliminating large
background areas that we wish invisible within a target image. In this
last case, we are referring to the making of a ".cpt" image - one where
an image shape may be irregular with some of the background invisible.
Free Hand
Mask
This mask is mostly used for acquiring an irregularly
shaped area that you will use or save as a ".cpt" type artwork. In
this irregular shaped picture, some of the picture will be in its full
color, and some will be transparent. This free hand mask is often
used best when the property bar is set to "normal" (the arrow). In
this case, start at a convenient portion of the outer perimeter line of
the object you wish to cut out. Then hold down the left mouse
button, and cut the item out around its perimeter going around all of it
carefully. When you have circled the whole object carefully with
this tool, double click it at its ending. Then you can copy the
cut out item to the clipboard (ctrl C again or ctrl insert) and then
paste it into another picture or save it as a separate ".cpt" image.
Note that pictures done like this can be superior to rectangular cutouts
- since the unneeded portion has an invisible background.
Note that you can also use the free hand mask as a "-"
item also. If the object that you have just made with your freehand mask
cut also has an internal section that should be invisible - for example
- then set your property bar to "-" for the mask. Then again set
your mouse cross hair on the perimeter of the section to be removed, and
hold down the left mouse button and go carefully around its edges, and
double click when back to the start. Then when you copy this
revised image to the clipboard, this new area that you have removed with
the "-" control, should now be invisible. Corel Photo Paint 8
shows invisible areas as a checkerboard pattern. An example of
this is below, where the cards are the image and the invisible
background shows up as a checkerboard pattern:

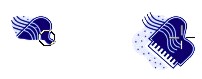
Magic Wand
Mask
Well, this next mask can be fun and be a real time
saver. It does take some adjustment and practice to get it right though.
In this case, if an object is on a plain background such as a total
white background or a total light blue background or something similar,
then the magic wand mask can often do the encircling of the outline of
the image that you wish on its own. For this case, start with the
image on the plain background. Let us try the magic wand with the
property bar set to "-". Click the magic wand with your left mouse
button inside the areas of blank color that are to be removed - both on
the exterior and interior portions of the image. Note that you
might have to have a good outline of the image on the areas to be wanded.
Then when you copy the image to the clipboard and re-paste it, you
should see that the wand has at least mostly found the image and removed
the other portions by making them transparent. The magic wand
settings used in the above playing card example were "HSB mode" where H
= 20, S = 10, and S = 10. These settings are likely not optimum
but worked in this case. One can get to the magic wand settings
when that tool is in use under "view/rollups/tool settings" in the main
pull down menu.
Air Brush Tool

This is great "paint" tool, and is particularly useful
for gentle shading - blending colors together while making some sections
a little bit darker than others. Ensure that you adjust its tool
settings to suit. Its tool settings are available when the air
brush is selected and then under "view/rollups/tool settings" in the
main pull down menu. If not sure of this tool, put the settings at
something like rate of flow = 3, and transparency = 84, as a possible
starting point. Then practice.
Brightness Tool

This is an "effects" tool, that can be used for shadows,
or help to frame images and make them more lifelike. Some practice
with this tool is also a good idea. Some starting settings for it
(under "view/rollups/tool settings") would be: amount = - 12
(minus in this case means darken, as for a shadow; with no "-" sign it
would brighten the area.) transparency = 50, soft edge = 35.
Clone Tool

This wonderful top member of the "clone tools" toolbar
was described here in the digital photo section
in the discussion about removing unwanted items. Yes, the clone
tool is great for "repairs". If you want an item on a picture to
disappear, or want to repair a messed up area, the clone tool might
help. For this tool, you might want to adjust the settings first
on "size" to ensure an adequate drawing tool size. Then first use
the right mouse button to place the clone tool cross hairs on the area
to be copied. Then move the round drawing area to the space where
the want that area to be copied now. In the normal case, the cross
hairs would be set on an undamaged portion of the background, and the
drawing area would begin in the section to be repaired or covered over.
Then press down the left mouse button, and the clone tool should copy
the area in the cross hair to the new area. An example below shows
an image of a piano being copied. The original piano image is on
the right in the cross hairs, and the area being copied is to the left
with the circular drawing tool.
shows the clone tool in action
NEXT PAGE -
Image-Sprayer Usage and Setup
Comments?
note: use the following link to also send comments to us
regarding this page. Note that comments may be linked to from that
page.
To rpsoft 2000 software
|